Generally speaking, an IP address is of vital importance for your device to be able to connect to the internet. It is the IP address that allows information to be routed to your computer, smartphone or what have you.
In this tutorial, we will be guiding you through the simple process of assigning a static IP address in Windows 8, Windows 10 and Android.
DHCP vs Static IP Address: What’s the difference and which one should I use?
Without getting into too many boring technical details, your router by default uses dynamic addressing via DHCP (Dynamic Host Configuration Protocol), instead of static IP addressing. DHCP is more efficient and convenient since it automatically assigns an IP address to the connected device with no effort needed from the user whatsoever.
Though, there are occasions where using a static IP address might be a better or the only option. It can sometimes be a better option, because static IP addressing usually provides better protection against network security issues that can not be handled by DHCP, more accurate geolocation and faster download and upload speeds.
When it comes to a static IP address being the only solution, there are still some older devices that do not support the DHCP technology. Therefore the user would have to provide the said device with an IP address manually.
Furthermore, in the event that you are trying to connect a device to your home WiFi, and it sticks to ‘Obtaining IP address’, typing in the IP address manually will sort this problem out.
Assign a static IP address in Windows 8 and Windows 10: Step-by-step
- Hit the following button combination: Windows+R
- Type in ‘ncpa.cpl’
- Click ‘OK’
- Right click on your Wi-Fi or ethernet connection
- Click on ‘Properties’
- Select ‘Internet Protocol Version 4’ (don’t uncheck the check box)
- Click on ‘Properties’
- Click on ‘Use the following IP address’
- Type in the necessary info
- Type in the necessary info in ‘Prefered DNS Server’ as well
- Click OK and then again
- Done!


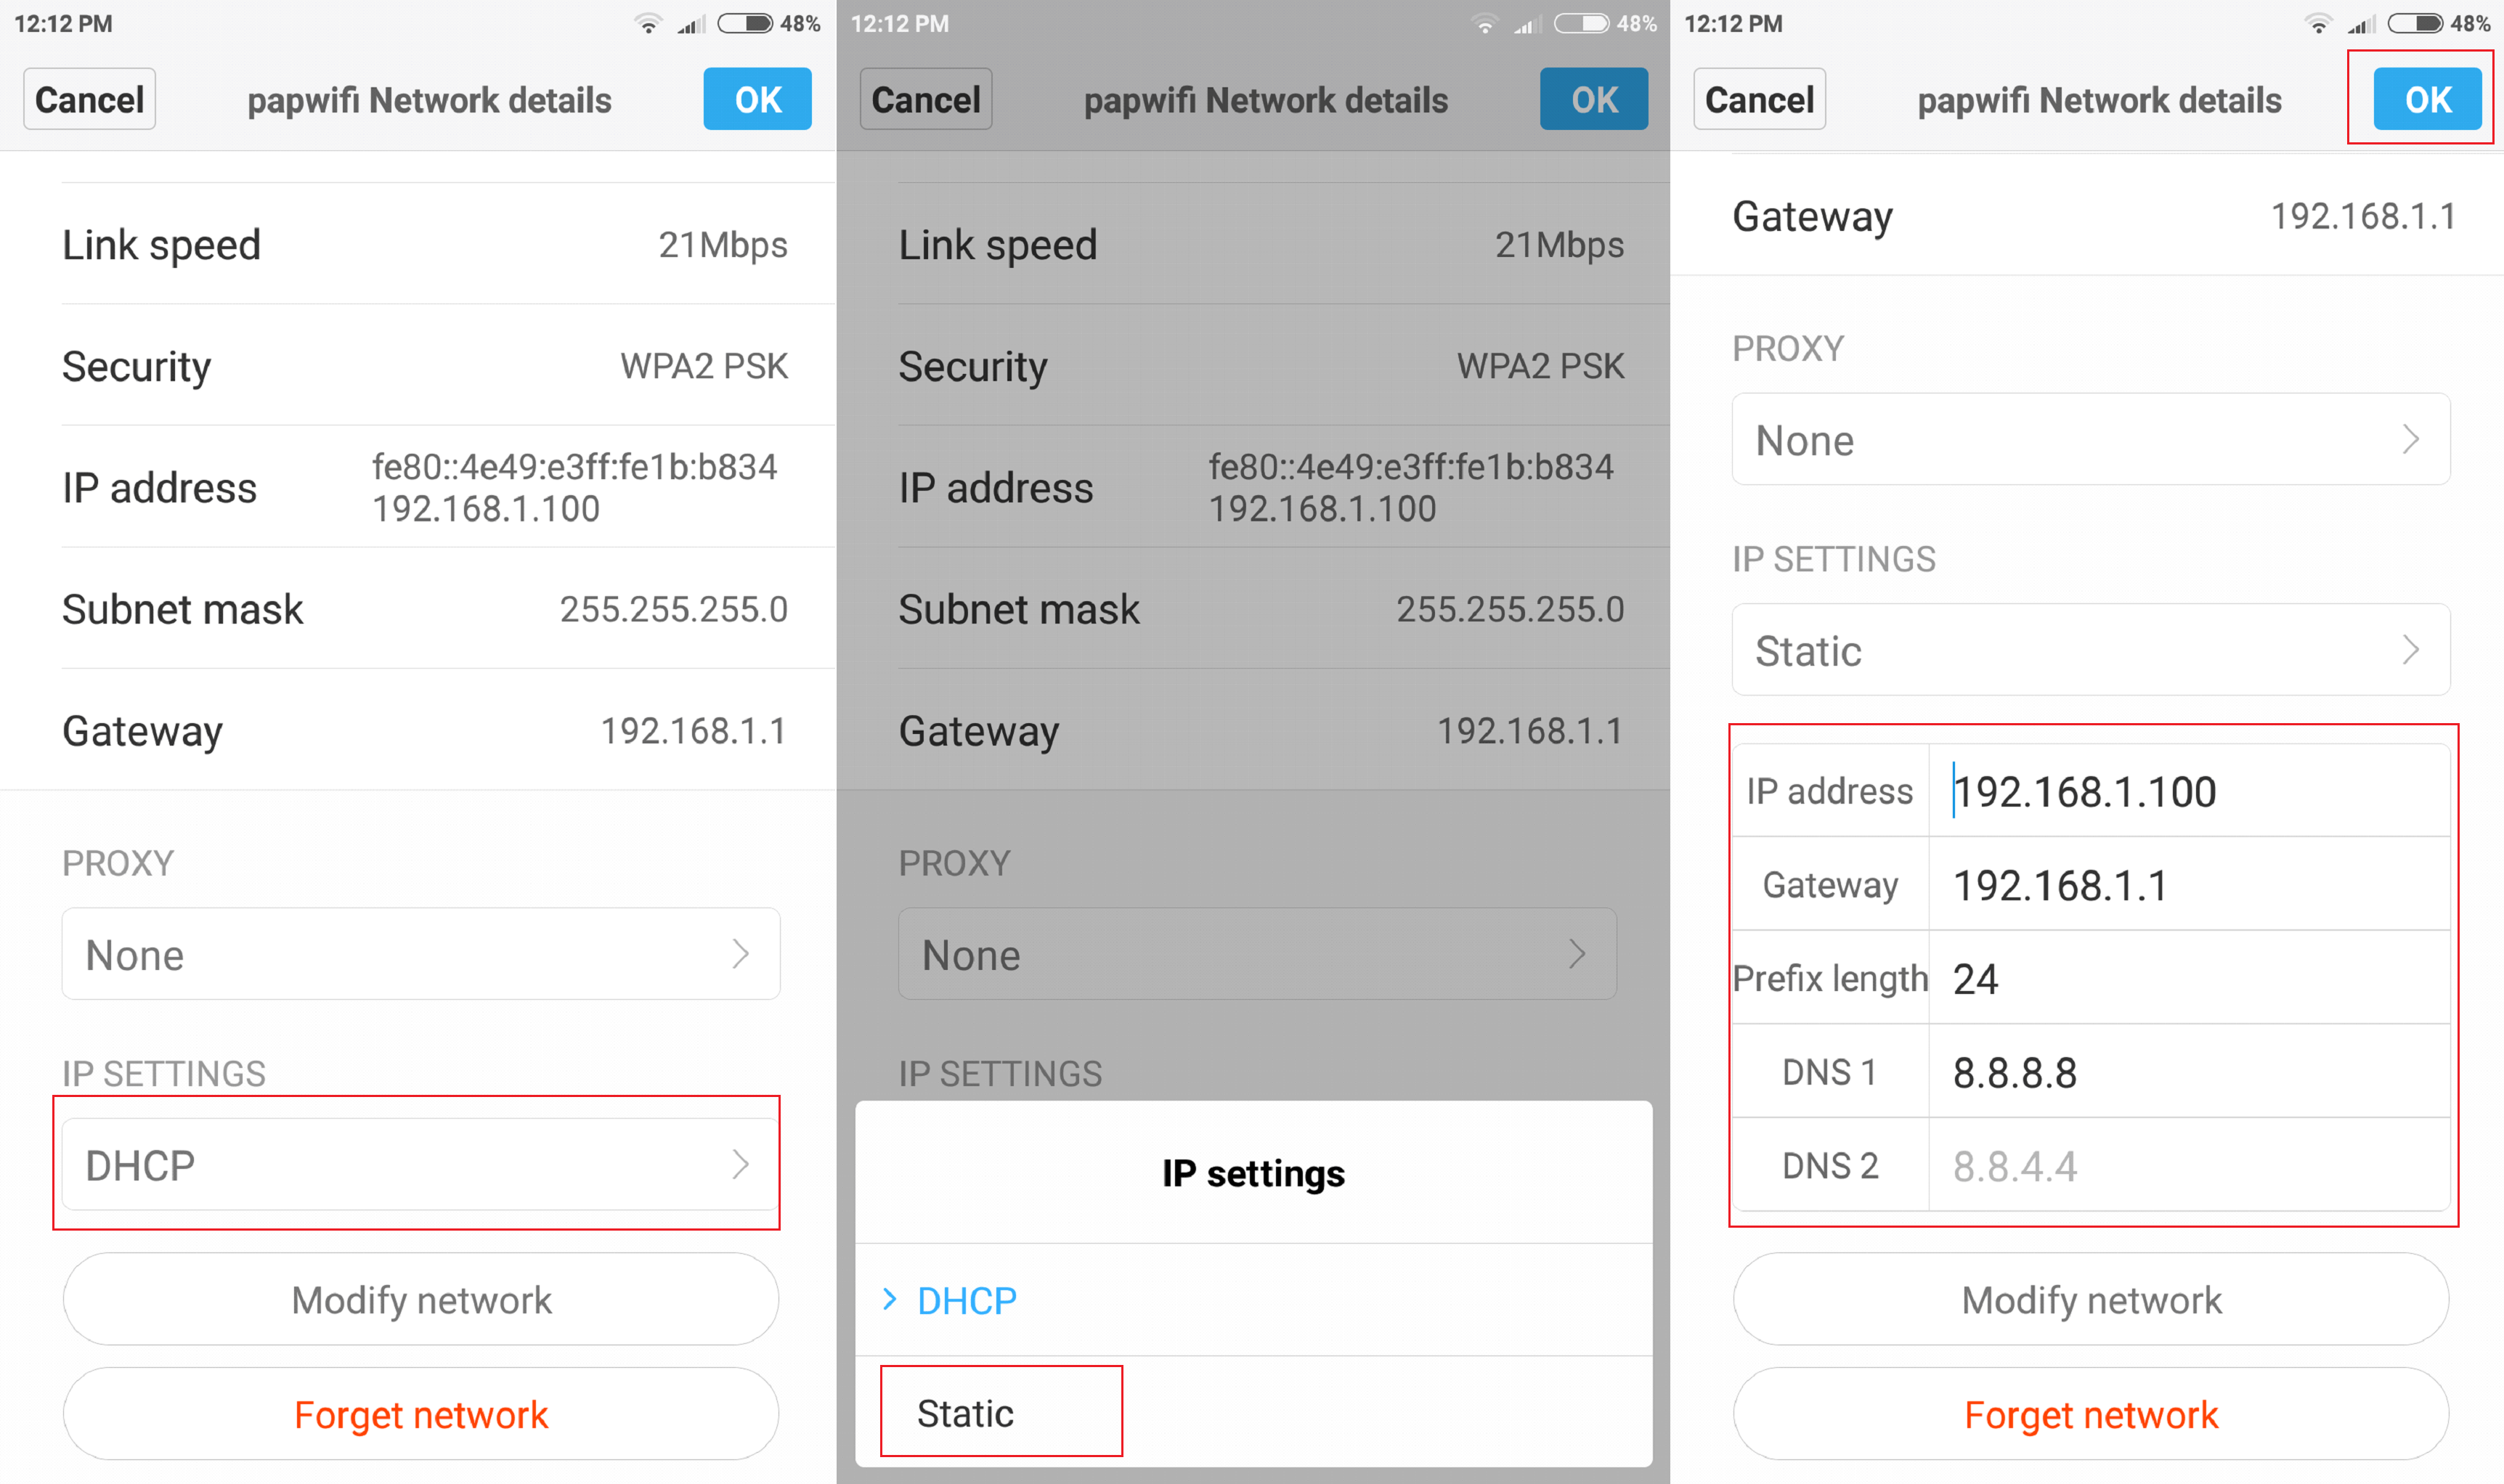
Assign a static IP address in Android
The process is similar to the one illustrated above.
- Open the Settings app
- Tap on the WiFi tab
- Tap on the arrow next to your WiFi’s name
- Find IP settings
- Select Static
- Type in the necessary info (it is usually there by default)
- Tap OK
- Done!

If you encounter any problems while trying out the above or have a recommendation to make, feel free to shoot a comment down below.
Filed in . Read more about Android and Networking.