Transferring files between Android devices is a pretty simple task, with a lot of options available to handle it, based on your device’s capabilities and the situation you are in.
In this tutorial, we are going to be showing you how to seamlessly send and receive files between Android smartphones and tablets. If you are not very familiar with accessing files on Android, we have a quick tutorial that can guide you through this process as well.
Method 1: Via Bluetooth
Let’s kick things off with the most classic option of the lot, which is Bluetooth.
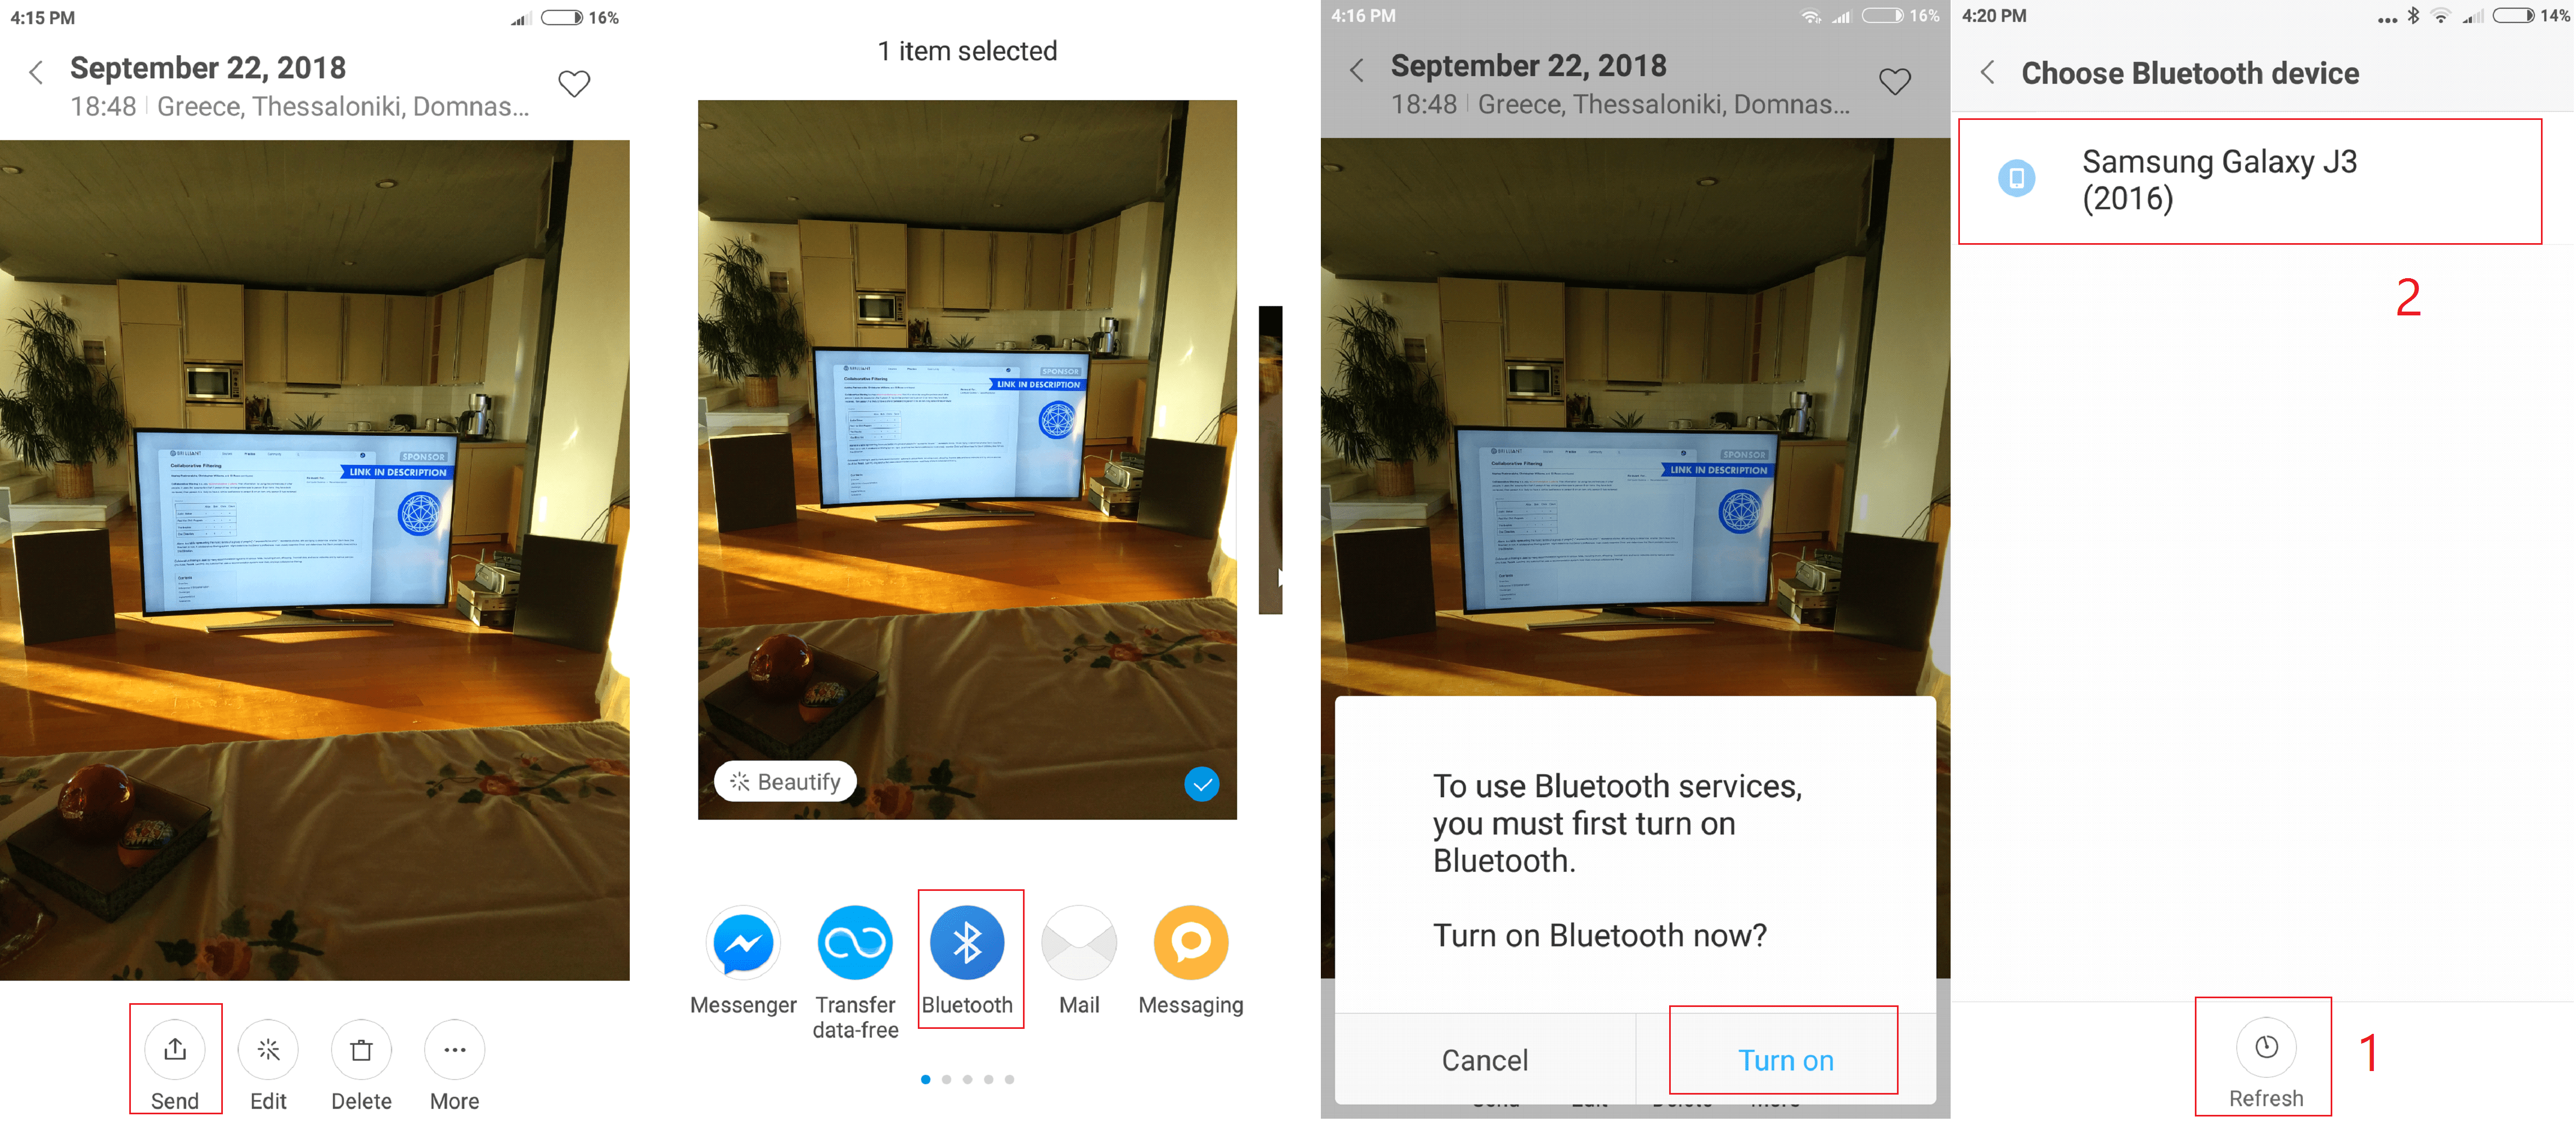
- Find the file you wish to send – any type
- Look for the share/send option. If it is not visible, it is usually available via a three-dot menu; tap on it and select it. If it isn’t visible, long tap on the file for the options menu to emerge.
- Select the ‘Share’ or ‘Send’ option
- Out of the many available sharing options, select Bluetooth
- A message will emerge asking you if you wish to enable Bluetooth. Select OK.
- Tap scan/refresh in order for your phone to scan for other nearby smartphones
- If plenty show up, check out the other device’s Bluetooth name and then select it from that list
- A file transfer request will show up on the other device’s display. Accept it.
Method 2: NFC
If your device is running on Android 4.1 or higher, and packs an NFC chip, then it supports Android Beam. It goes without saying that both devices need to feature NFC connectivity for this to work.
- Pick up the recipient phone, go to Settings>Connectivity and look for NFC
- Turn it on
- Don’t lock the device, make sure its display is turned on
- Head up to the sender phone and find the file you wish to share
- Like above, open the sharing menu and select Android Beam
- Place the two devices back to back; a ‘Touch to beam’ option will be displayed on the sender phone
- Tap on it and the transfer will automatically commence

Method 3: Via Messaging apps
Another super quick way of transferring files between two Android smartphones (and iPhones in that case too), is via various messaging apps. In this tutorial, we are going to be using Viber and Facebook Messenger, though there are plenty of other options out there as well (i.e. WhatsApp). The file transferring process is pretty similar all across those services.
It is worth noting here, though, that some of those messaging platforms might not support the transfer of all types of files. For instance, a user cannot send .zip files via Messenger.
On Messenger:
- Make sure you are connected to the internet either via WiFi or data
- Find the file you wish to transfer
- Open the sharing menu
- Select the Messenger app
- If the contact you wish to send the file to is not in the featured ones, use the search bar above to look for the particular user
- Hit ‘Send’

On Viber:
- Make sure you are connected to the internet either via WiFi or data
- Find the file you wish to transfer
- Open the sharing menu
- Select the Viber app
- Look for the contact you wish to send the file to. Tap on it
- Hit ‘Send’

Method 4: Email
If all else fails, you can always use email. It is not the most time-friendly option, as you have to first upload the file to be able to send it. On the upside though you can send virtually any type of file via email.
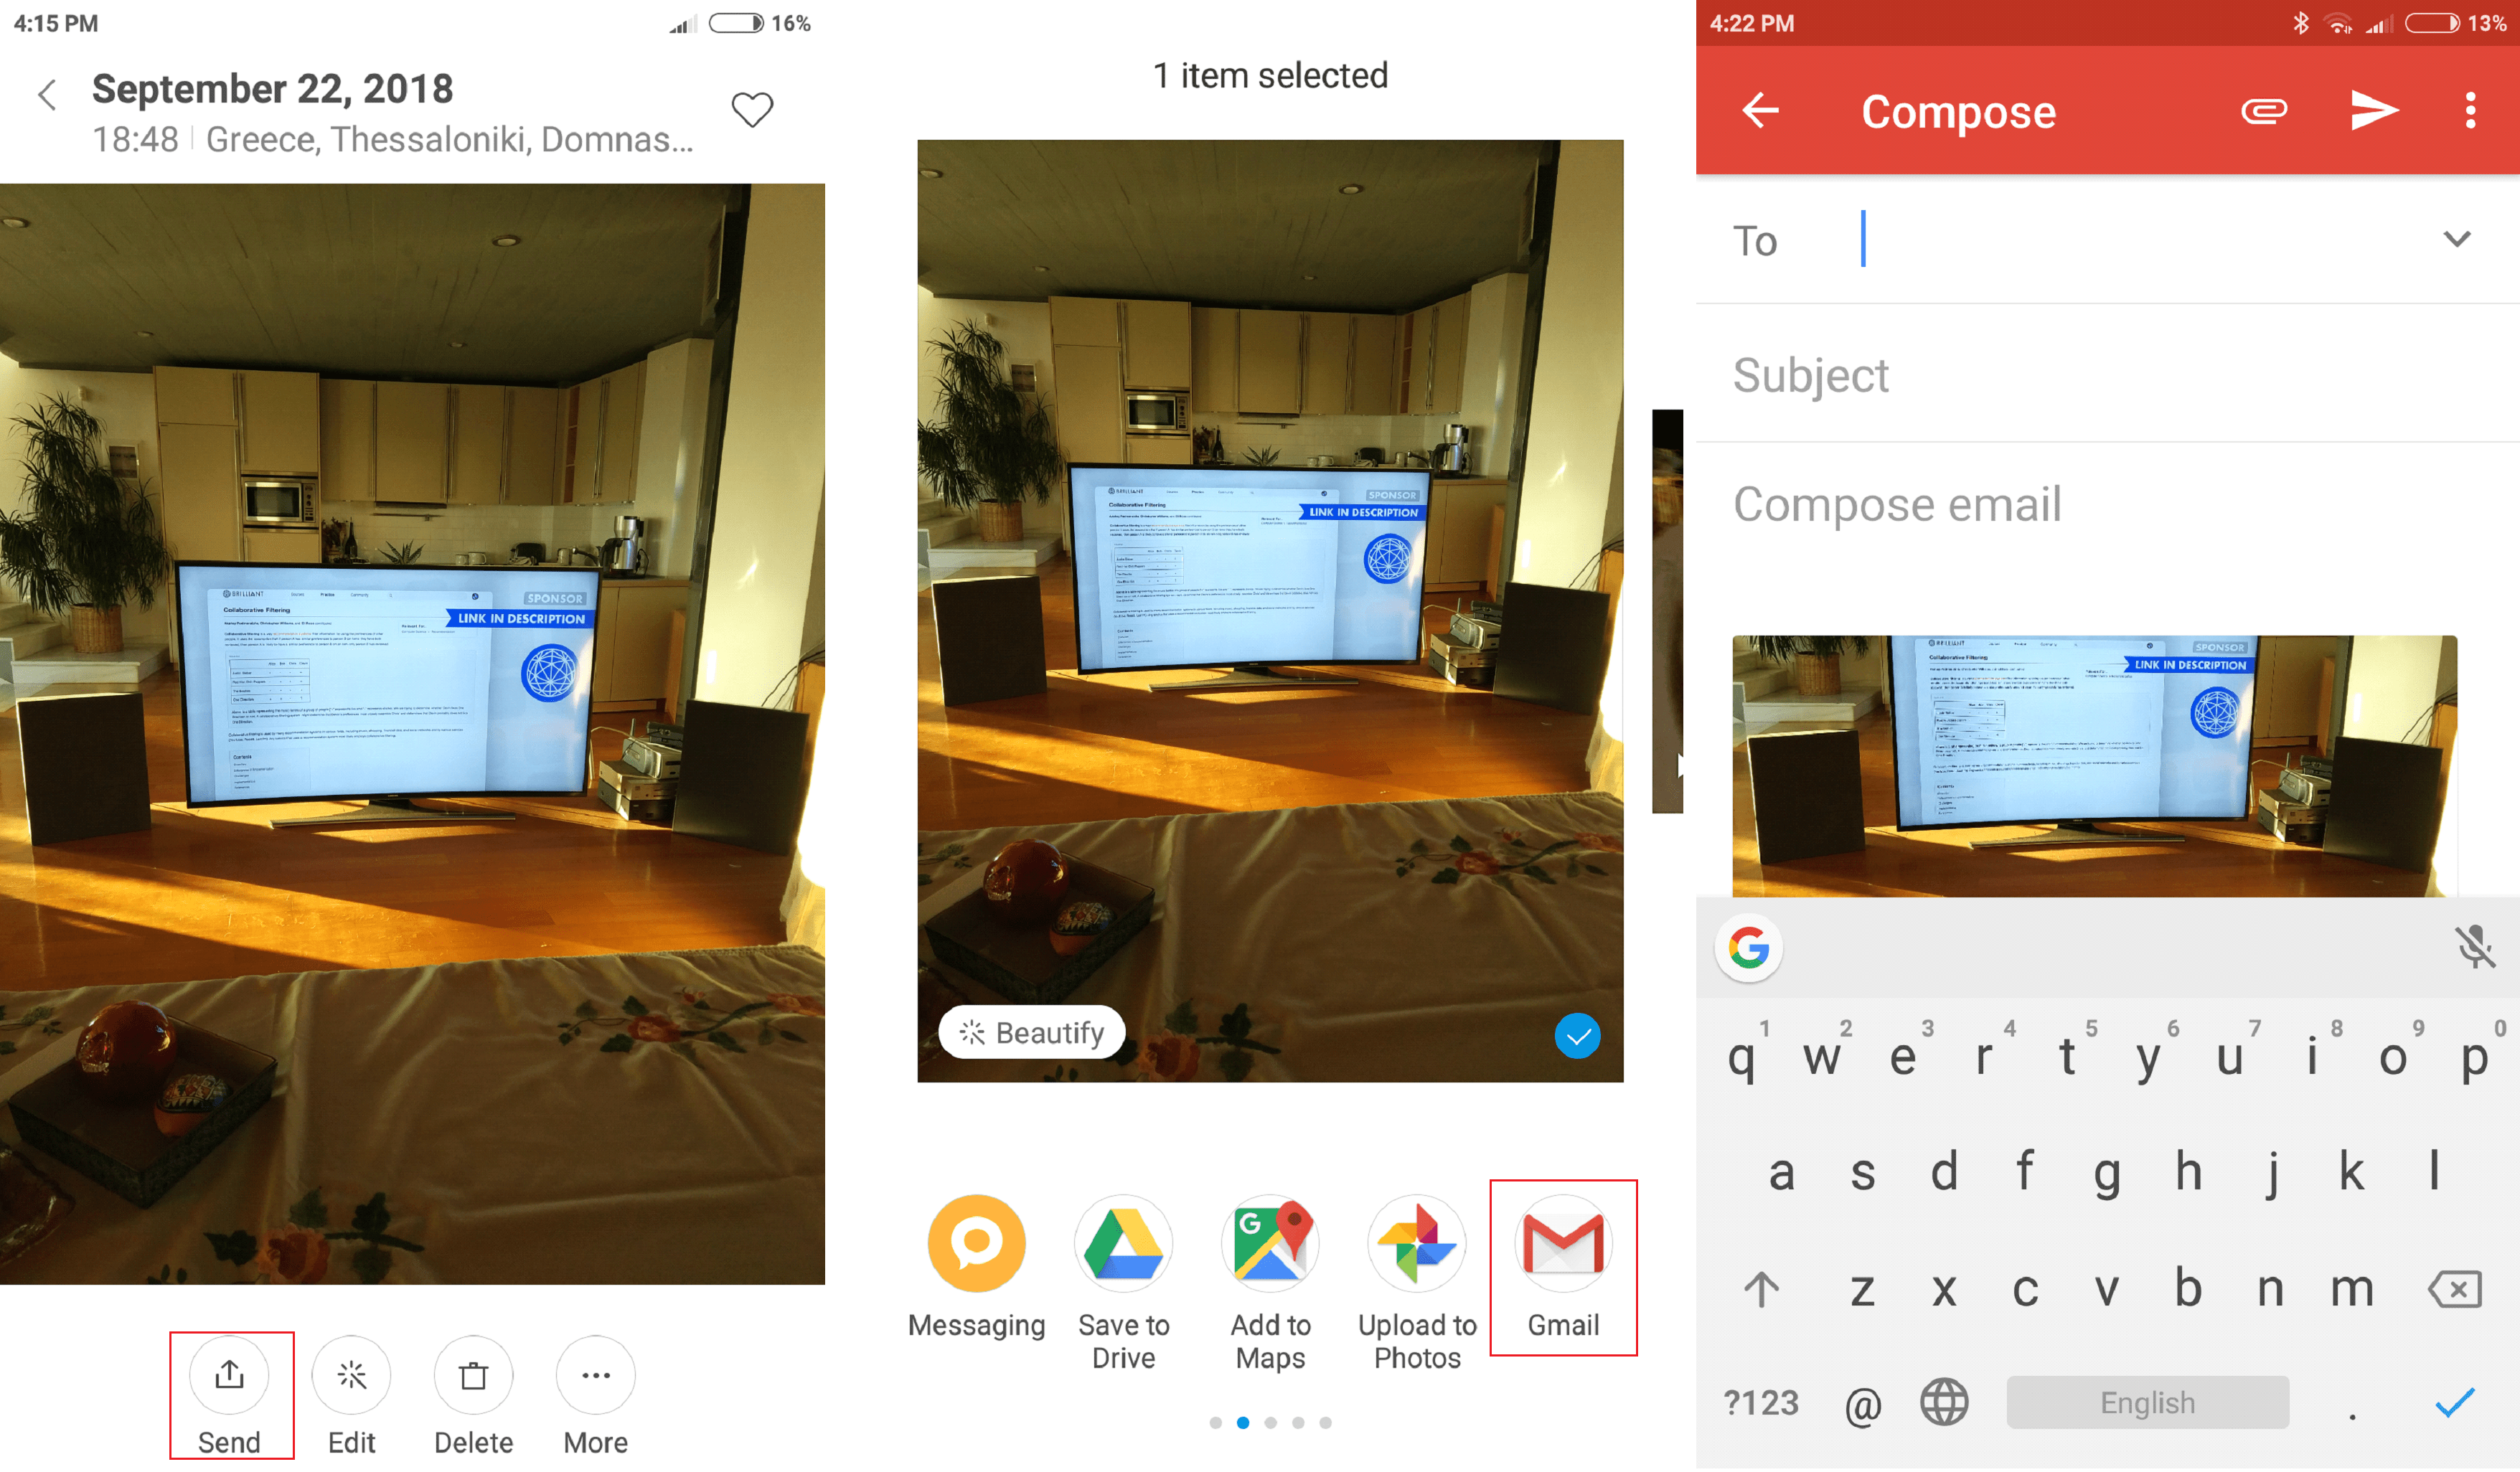
- Make sure you are connected to the internet either via WiFi or data
- Find the file you wish to transfer
- Open the sharing menu
- Select Gmail (or email, if you don’t use Gmail)
- Write in the person’s email
- Hit ‘Send’
If you encounter any problems while trying out the above or have a recommendation to make, feel free to shoot a comment down below.
Filed in . Read more about Android.